How a self-service kiosk sale works
Customer picks a product
On the kiosk screen, from your assigned collection
Kiosk weighs and prints
A label with a weight-embedded barcode
Staff scan at the till
Any Shopify supported scanner
Cart line at the right price
Weight and rate on the receipt
Kiosks suit self-serve produce, bulk bins and pick-and-mix, where customers fill their own bags and staff would otherwise weigh every item at the till. Nothing is typed and no scale needs to sit at the checkout.
Hardware you need
Required configuration
- Single screen
- No AI camera
- With label printer
- Android 11
- CE and other certificates
The tested model is a commercial supermarket price-computing electronic scale sold on Alibaba. When ordering, request the configuration above exactly. View the tested scale on Alibaba
Plan requirements
| Plan | Self-service kiosks | Scales connected to POS |
|---|---|---|
| Starter | None | None |
| Plus | Up to 2 | Up to 1 |
| Minimarket | Up to 3 | Up to 2 |
| Supermarket | Up to 10 | Up to 10 |
Every plan has a 14-day free trial. Compare all plans
Create the kiosk device record
Step 1: From the VahaPOS dashboard, choose Create Device.
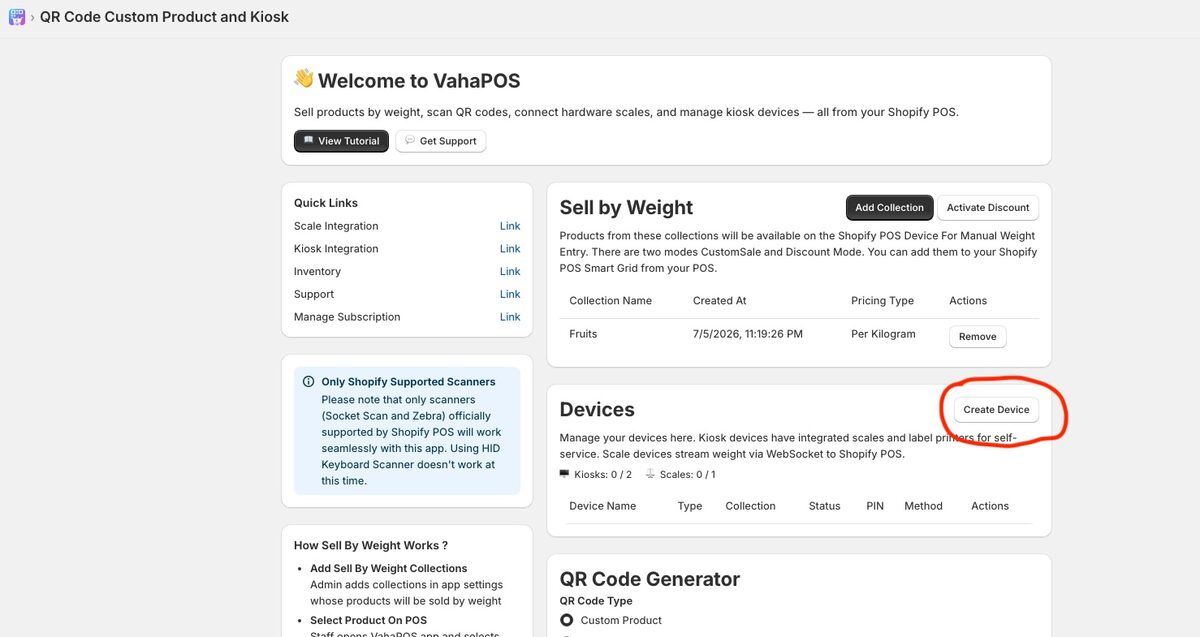
Step 2: Set the device type to Kiosk.
Step 3: Choose the collection, weight unit, pricing unit, currency and logo.
Only products from the chosen collection appear on that kiosk, so you can run different kiosks for different counters.
Step 4: Save. The device is listed with a PIN, used to unlock settings on the terminal itself.
Install the companion app on the kiosk
Step 1: On the scale terminal, install the VahaPOS: Aclas Scale app from Google Play.
The app is distributed through a closed testing programme. Join it with the Google account signed in on the terminal, wait a minute or two, then install from the Play Store.
Step 2: Open the app. It shows a 6-character Key Code.
Step 3: In your Shopify admin, open the kiosk device and enter that Key Code.
Step 4: The terminal syncs your products and is ready to use.
An internet connection is needed for setup and product sync.
Scanning the labels at the till
Kiosk labels carry a weight-embedded EAN-13 barcode. The VahaPOS Scan Code or Enter Weight Manually tile reads it and adds the product with its weight already attached, so staff scan and move on.
- Add the manual entry tile to your POS Smart Grid if it is not there yet. How to add it
- Use a Shopify supported Bluetooth scanner such as Socket Scan or Zebra, or the camera.
- Each scan adds one labelled item at the price computed by the kiosk.
If something is wrong
| What you see | What it means |
|---|---|
| Key Code not accepted | Check you are entering it on the kiosk device record, not a scale device, and that the code has not expired. |
| Products missing on the kiosk | The kiosk shows one collection only. Check the collection assigned in the device record and that the products are in it. |
| Label does not scan | Confirm the POS tile is the VahaPOS one, and that the scanner is Shopify supported. HID keyboard scanners do not work. |
| Wrong price at the till | The pricing unit on the kiosk must match the collection pricing type set in the setup guide. |
| Create Device is disabled | You have reached the kiosk limit for your plan. Upgrade or remove an unused device. |